Dec 28, 2025
Cursor Tutorial
Cursor Rules
RULES:
Exist many ways to get rules in cursor:
- Project Rules:
- User Rules;
- Team Rules(premium)
- Agent.md
- Project Rules:
- can be stored in .cursor/rules version-controlled and scoped to your codebase
- When you applied rules content are included at the start of the model context to have guidance for code generations, helping to create better workflows and the model knows how edit you codebase by the command @rules → you rule.
- Invoke manually or include base on relevance.
- Subdirectory also can include their own .cursor/rules directory scoped to that folder
- Use this to domain-specific knowledge about the codebase, automize some workflows or templates, and standardize style or architecture decisions
- Rule anatomy Each rule file is written in MDC files a format supporting metadata and context. You can define how the rules are applied from the top drop down which changes properties
- rules type: Always(include always in model context), Auto attached(by matching a glob pattern “**/*.ts”, Manual(include when is mentioned using @
---
description: RPC Service boilerplate
globs: ["**/*.ts", "**/*.tsx"]
alwaysApply: false
---
- Use our internal RPC pattern when defining services
- Always use snake_case for service names.
@service-template.ts- Nested Rules to get organized rules by placing them in nested directories throughout your project
project/
  .cursor/rules/        # Project-wide rules
  backend/
    server/
      .cursor/rules/    # Backend-specific rules
  frontend/
.cursor/rules/ # Frontend-specific rules- Generate Rules. you can generate rules directory using the command “/Generate Cursor Rules”
Best practices
- keep rules under 500 lines.
- Split large rules into multiple and composable rules.
- Provide concrete example or references in the code.
- Avoid vague guidance, clear like a internal docs.
- Reuse rules when repeating prompts in chat
———————————————————
AGENTS: running tools in a loop.
- instead tell to ai what to do, step by step, you give a goal and leave him figure out the step to reach to the goal
——————————————————— TIPS:
- use plan mode (use command .), to create high quality plan to implement in the project
- you’ll get a markdown of the plan, edit it if you need something else
- this will return a lot of questions to clarify the feature or what you want to do
- you can use @git to use branch and target branch changes with another branch
- creating custom commands
- create commands in “.cursor/commands/*” as example pr.md
- as example make code review following some alignments or in this case to create Pull request automatically as you need
- in the chat use “/pr” only to use this command, by pressing “/” you will see to use the command
- pass images to the agent or many images, fix it with files by using @
- you can duplicate/fork chats to another chat
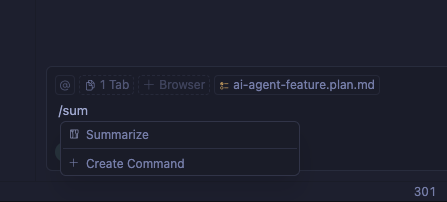
- Summarize, use this feature with /sumarize command, this with you want to decrease the context usage for model, this feature is used when you current model reach to the limit and a new chat with llm is started, in configuration you can make summarize automatically or not you conversation with the model
- command + i to open the chat window and command + / to change mode you want to use
- if the current chat continues growing the quality with de model degrades over the time with more staffs, try create new conversations (use command + n)
- back in time of the conversation in the current chat you can press back to previous state

INLINE EDIT:
use command + k selecting a code block and that opens an input field where you selected, readty to give instructions to make changes in that block
TERMINAL
in the terminal press command + k too to open in the bottom a bar, describe there action you cant and the ai generates te command